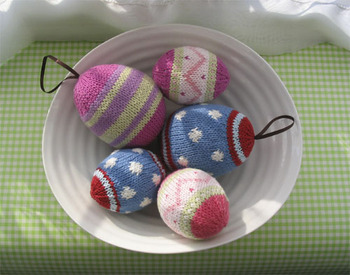
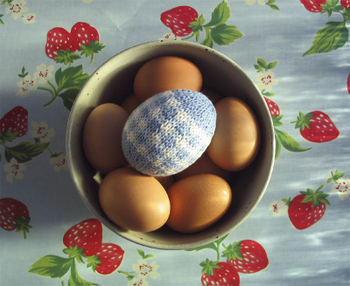
This pattern uses oddments of 4 ply yarn and uses 2.75 mm needles. My tension
works out to 8 stitches and 10 rows per inch. The egg is knitted flat and then seamed using mattress stitch. You
can stuff the finished egg with polyfil / wool / cotton wadding or it
will fit around a polystyrene egg.
Row 1: Cast on 11 stitches (leaving a length of yarn about 6 inches for sewing up later)
Row 2: Purl
Row 3: K2, (*M1, K1) 8 times, K1 (19 stitches) *M1=make one,
Row 4: Purl
Row 5: K2, (M1, K1) 16 times, K1 (35 stitches)
Row 6: Purl
Row 7: Knit
Row 8: Purl
Row 9: K3, M1, (K2, M1) 6 times, K3, M1 (K2, M1) 7 times, K3 (50 stitches)
Row 10: Purl
Row 11: Change to yarn color for pattern band - work chosen pattern
band over the next 12 rows (see charts below for pattern suggestions) or
simply use a contrasting color for middle 12 rows.
Zig zag pattern using 3 colors:
Polka dot pattern using 2 colors:
Stripe pattern using 2 or more colors:
gingham pattern using 3 colors:
Or why not design your own band (50 stitches x 12 rows):
Row 23: change yarn color and work 2 rows without shaping
Row 25: K3, K2 tog, (K2, K2tog) 11 times, K1 (38 stitches)
Row 26: purl
Row 27: K2, K2 tog, (K1, K2tog) 11 times, K1 (26 stitches)
Row 28: purl
Row 29: knit
Row 30: purl
Row 31: K1, (K2 tog) 12 times, K1 (14 stitches)
Row 32: purl
Cut
the work from the yarn leaving an end around 6 inches long, thread end
through stitches on needle and pull up tight. Use this end to begin
sewing up the seam. Sew around 1 inch of seam and then begin seaming at
other end of egg. If you want to hang the egg as a decoration then cut a length of
ribbon and tie the ends together. Thread the loop through the gathered
stitches at the pointed end of the egg leaving the knotted part inside.
At the other end of the egg thread the length of yarn left by the
cast on and use to catch up the 11 stitch loops and up pull tight.
Continue in mattress stitch to close the seam - leaving around 2 inches
of unclosed seam to stuff the egg (if using polyfil or similar). If you
are fitting it around a polystyrene egg just sew around half an inch of
seam at either end and close the rest of the seam with the polystyrene
egg in place. When the seams meet tie off ends and thread inside trimming off any excess ends.
Copyright © Julie Williams 2006.


